::blows away the dust:: Hello? Anyone still out there? I'm not sure if anyone was ever following me to start with, and by now, they've probably already left, thinking they had been abandoned. No, not abandoned, just busy. Anyway, my goal is to try and post at least two recipes per month for 2013. I have a bunch of pictures and things that I took last year, but just never got them posted. If anyone is still there, I hope you enjoy.
Hope you have a delicious and happy 2013!
Tuesday, January 1, 2013
Wednesday, February 29, 2012
Baked Macaroni and Cheese from Annette - Family Favorite
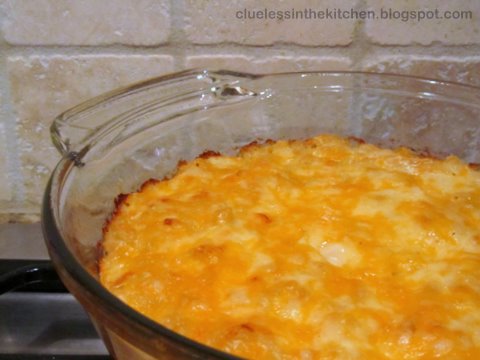

Today is Leap Day (February 29, 2012), so I thought it deserved a special recipe. This is recipe that started it all! This is the first real "from scratch" recipe I ever learned to make. Macaroni and Cheese is one of my most favorite foods in the world, and after a while, the box version at home just wasn't cutting it. As mentioned in my very first post on this blog, I credit my good friend Annette in general, and this recipe in particular, with starting me on the path to actually learning to cook. As you can see from this blog, I still make plenty of things that involve ingredients from a can or box, but I do less of it now than I used to (no more Hamburger Helper! LOL), all thanks to her and this recipe. I've made two slight alterations (the addition of 1/2 tsp dried mustard, and backing down the temp to 350 to start, but that is mainly due to my "hot" oven; original recipe called for 375), and I've tinkered with the cheese blend off and on. I've tried several other mac and cheese recipes, and I always come back to this one.
Baked Macaroni and Cheese
Source: Annette Wright
Ingredients:
- 8 oz macaroni or other small shaped pasta
- 1/4 cup butter or margarine
- 1/4 cup flour
- 1 teaspoon salt
- 1/8 teaspoon pepper (optional)
- 1/2 teaspoon dry ground mustard (optional)
- 2 cups milk
- 2 cups shredded cheese blend of your choice, divided (1 1/2 cups and 1/2 cup)
Directions:
- Preheat oven to 350 degrees F.
- Cook pasta according to package instructions; drain.
- In medium sauce pan, melt butter over medium heat. Remove from heat and add flour, salt, pepper, and mustard, whisking until smooth.
- Replace on medium heat and slowly add milk, stirring constantly. Bring mixture just to a boil (stirring still). Reduce heat to low and simmer for one minute.
- Remove from heat and add 1-1/2 cups cheese. Stir until smooth. Add pasta, stirring until well coated. Pour into greased 2 quart baking dish and sprinkle with remaining cheese.
- Bake for 35-40 minutes, or until bubbly. If not yet brown, increase oven temp to 400 and check at 3 minute intervals until brown. Let stand 5 minutes before serving.
Notes:
- Annette's note: Works well with Farfalle or Rotini pasta. Also good with a mix of cheddar and swiss.
- Erin's note: I really like elbows (preferably the ones with ribs/ridges, but the smooth ones are okay), rotini, or ditalini pasta. Our family favorite cheese blend is 1/2 sharp cheddar and 1/2 fontina. Recipe is also easily scalable, from 1/4 of these amounts for a single serving, up to at least doubled (that's as high as I've gone).
Saturday, February 25, 2012
Red Lobster Style Cheddar Biscuits from Budget101
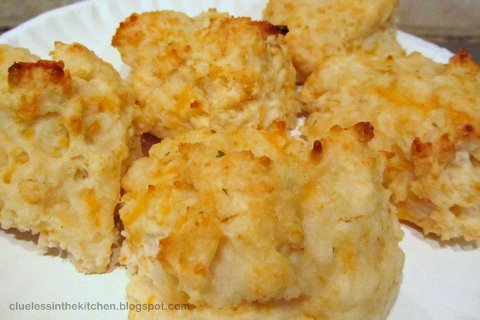
My son absolutely loves Red Lobster biscuits. He likes fried shrimp, but he likes the biscuits more! Sometime last summer when I was out of work, he was literally begging us to eat there because he wanted biscuits. I finally decided that surely I could at least try to make them at home. Even if it took me several tries to get it right, it would still be cheaper than a single trip to Red Lobster. My son loved them, which was the whole point, and to be as super quick as they are, they were pretty darn close. I have a few other recipes to try that are similar, but I thought I would start with the simplest (this one) and work my way up. But for yummy and super quick, these were quite good.
Red Lobster Cheese Biscuits
Source: Budget101.com
Ingredients:
- 2 C buttermilk baking mix
- 2/3 C milk
- 1/2 C shredded cheddar cheese
- 1/4 C butter
- 1/2 tsp garlic powder
Directions:
- Preheat oven to 450 degrees.
- Combine mix, milk and cheese with a wooden spoon until soft dough forms. Beat vigorously 30 seconds.
- Drop dough by heaping tablespoonfuls onto an ungreased cookie sheet. Bake 8 - 10 minutes until golden brown.
- Combine butter and garlic powder; brush over warm biscuits before removing from cookie sheet. Serve warm. Makes 10 large biscuits.
Erin's Notes: I used Bisquick and sharp cheddar (always do), and I did add 1/4 tsp garlic powder to the mix in addition to what is called for in the recipe.
Wednesday, February 22, 2012
Crock Pot Stew Beef with Gravy from RecipeZaar
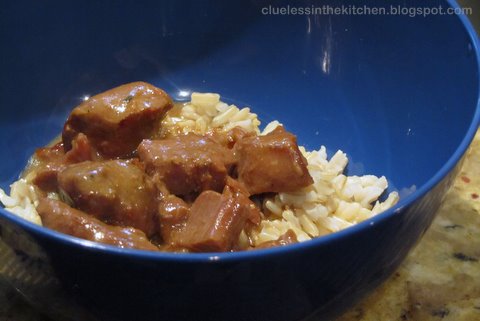
My mom found this recipe. I've loved it from day one. So yummy! It freezes quite well (without the rice, obviously), at least in single serve portions; I haven't tried to freeze a large portion. The original version does not call for the cream of mushroom soup. I've made it both ways, and I much prefer it with the soup. Recipe is easily doubled if your crock pot can hold it all!
To Die for Crock Pot Roast by yooper
Source: slightly adapted from RecipeZaar.com Recipe #27208 (now Food.com)
Ingredients:
- 1 (approx. 1 1/4 ounce) package brown gravy mix, dry
- 1 (approx. 1 1/4 ounce) package Italian salad dressing mix, dry
- 1 (approx. 1 1/4 ounce) package ranch dressing mix, dry
- 2-3 pounds beef stew meat, trimmed of large pieces of fat
- 1 (10 3/4 oz) can cream of mushroom condensed soup (fat free is fine)
- 1/2 cup water
- 2-3 cups prepared rice (white or brown)
Directions:
- In a small bowl, combine gravy mix, italian salad dressing mix, and ranch dressing mix. Stir to evenly combine. For 2-3 pounds stew beef, only use half of this dry mixture in the crock pot. Reserve the other half for a later date.
- Place stew meat in crock pot. Sprinkle the dry mixture over the meat. Pour the water around the roast. Top with cream of mushroom soup.
- Cook on low for 7-9 hours, or high for 5-6 hours. Serve over rice.
Notes:
- Adjust the amount of dry mix you use based on the amount of meat you use.
- It is difficult for me to find exactly 1.25 ounce packages of the dry mixes. I buy what is available in the closest amounts.
- I layer half the meat, then half of the dry mix, then half the meat, then half the dry mix. The meat seems more evenly flavored that way. I do put the water and the soup just on top. It "melts" and filters down just fine.
- I do take the lid off and stir to even out the sauce 30-60 minutes before serving.
Comments from RecipeZaar:
- You can also use chicken breast with chicken gravy mix or turkey breast with turkey gravy mix along with the ranch and italian dressing packets and water. Equally yummy! (Erin's Note: I have not personally tried this, but it bet it would be good.)
Monday, February 20, 2012
How to Make a Box Cake Mix Taste Like a Cake From Scratch
Okay, maybe not *exactly* like scratch, but much closer than a box cake mix made strictly according to package instructions. More than once, I've had someone ask me if a cake I made from a box was from scratch using this trick. I got it from my grandmother; I'm not sure who she got it from. And this works with any flavor of standard (approximately 18 oz) box cake mix. I always swore I wouldn't give away my secret, but since I now have an easy scratch butter cake recipe, I pretty much don't use this anymore. So I'm sharing it with you! :-)
Box Cake Mix Additives
Source: Jacqueline Warren
Ingredients:
- 1 (approx 18 oz) box cake mix, any flavor
- ingredients in amounts listed on the package to prepare cake
- 2 Tablespoons vegetable oil (in addition to what the package calls for)
- 2 Tablespoons light corn syrup
- 2 Tablespoons self rising flour
Directions:
- Prepare cake mix as directed on the package, adding additional oil, corn syrup, and flour when other ingredients are added.
- Mix and bake as directed on package.
Tip: If you measure the oil in the measuring spoon first, then the corn syrup, the corn syrup will just slide out of the spoon without sticking.
Friday, February 17, 2012
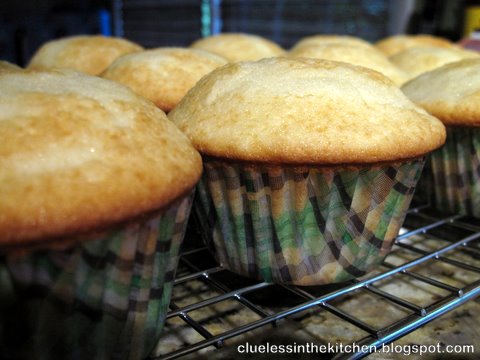
White Wedding Cupcakes
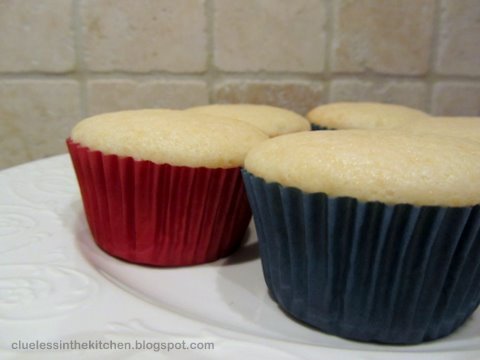
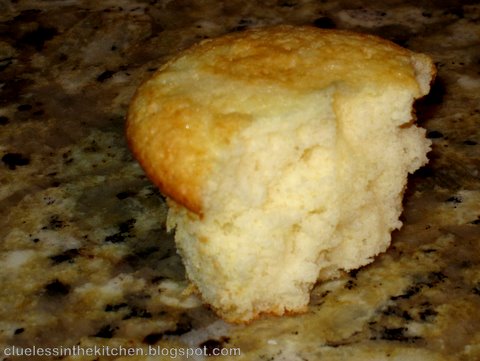
To be fair, I wanted to show that I have tried other cake recipes. This one was billed on Pinterest as "the best cupcake/cake batter recipe ever." (Pin here.) Worth a try, right? I decided to test it out back in the fall before my son's birthday, just in case it really was better than my scratch butter cake recipe. They're supposed to be white (i.e. no egg yolks), but I made the mistake of trying to separate my eggs over the mixing bowl, so one egg yolk did slip in accidentally. I don't think it affected things much, though.
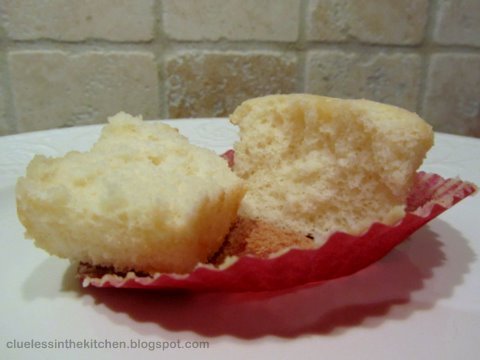
These were pretty good. We certainly ate them all. It's a doctored cake mix recipe, which I don't mind, but my scratch butter cake is better, as are my own "cake mix additives" (I'll post them sometime later). I don't care for the tang of the sour cream. It became less pronounced over the first 2-3 days, then started to reassert itself near the end. (I realize most folks don't have cake hanging around for a week, but it took that long for us to eat them all! It makes a ton.) If you like that kind of tank in your cakes, you might like these. Like I said, not bad, but I have two other recipes I prefer, so I probably won't make these again. That's not a reflection on the recipe, just my personal tastes.
White Wedding Cupcakes
Source: RecipeGirl.com
Ingredients:
- 1 (18.25 ounce) box white cake mix (recommend Duncan Hines)
- 1 cup all-purpose flour
- 1 cup granulated white sugar
- 3/4 teaspoon salt
- 1 1/3 cups water
- 2 Tablespoons vegetable or canola oil
- 1 teaspoon vanilla extract
- 1 cup sour cream
- 4 large egg whites
Directions:
- Preheat oven to 325°F. Place cupcake liners in cupcake pans (you'll need approx. 36).
- In a large bowl, whisk together cake mix, flour, sugar and salt. Add remaining ingredients and beat with hand mixer for 2 minutes, or until well blended.
- Use ice cream scoop to fill prepared cupcake tins- fill about 3/4 full. Bake about 18 minutes, or until toothpick inserted in center comes out clean. Cool completely, then frost as desired.
Wednesday, February 15, 2012
Yellow Butter Cake with Creamy Vanilla Frosting from Betty Crocker - Family Favorite
My son had been asking "are we having cake?" for weeks, so as a Valentine's Day treat, I made cupcakes. My sister-in-law J gave me this recipe. She used it to make our niece's second birthday cake, and I was blown away. It is so very good! Soft, fluffy, great texture, and not too sweet. And it is nearly as easy to make as a box cake mix. Ten years ago, I never would have thought I'd be making cakes from scratch, but this one is both easy and excellent. I've used it for the last 3 years for our son's birthday cake, and everyone raves about it.
I will admit that this cake is better after sitting for a day. If you try one warm out of the oven, you might find them just a touch dry. Letting them sit (covered, but not sealed air tight) and absorb some moisture out of the air will improve them, so bake your cake a day before frosting it if you can. I've never made the citrus variation, but I thought I would list the instructions anyway. And when the cupcake instructions say "fill half full," they mean it! Much more and they will overflow. (Ask me how I know.)
I don't have a photo, but I have also included J's basic buttercream recipe at the bottom. It has the best balance of sugar to butter to vanilla to salt (yes, salt!) that I have found.
Yellow Butter Cake
Source: Betty Crocker
Ingredients:
- 2.5 cups all purpose flour
- 2.5 teaspoons baking powder
- 1/2 teaspoon salt
- 2/3 cup butter or margarine
- 1-3/4 cups sugar
- 1-1/2 teaspoons vanilla
- 2 eggs
- 1-1/4 cups milk
- (see below for creamy vanilla frosting)
Directions:Notes:
- Preheat oven to 375.
- Grease and lightly flour two 8x1-1/2 inch or 9x1-1/2 inch round baking pans or grease one 13x9x2 inch baking pan; set pan(s) aside. Combine flour, baking powder, and salt; set aside.
- In a large mixing bowl, beat butter or margarine with an electric mixer on medium to high speed for 30 seconds. Add sugar and vanilla; beat till well combined. Add eggs, one at a time, beating 1 minute after each. Add dry mixture and milk alternately to butter mixture, beginning and ending with dry, beating on low speed after each addition just until combined. Pour batter into the prepared pan(s).
- Bake in a 375 oven for 30-35 minutes or till a wooden toothpick comes out clean. Cool layer cakes in pans on wire racks for 10 minutes. Remove layer cakes from pans. Cool thoroughly on racks. Or, place 13x9 inch cake in pan on a wire rack; cool thoroughly. Frost with desired frosting. (See frosting recipe below.) Serves 12.
- For Citrus Yellow Cake: Prepare as above, except stir 2 teaspoons finely shredded orange peel or lemon peel into the batter.
- For Yellow Cupcakes: Grease and lightly flour 2-1/2 inch muffin cups or line with paper baking cups. Prepare cake as above. Fill each cup half full. Bake in a 375 oven for 18-20 minutes or till a wooden toothpick inserted in center of a cupcake comes out clean. Cool on a wire rack. Makes 30 cupcakes.
Creamy Vanilla Frosting
Source: Betty Crocker
Ingredients:
- 3 cups powdered sugar
- 1/3 cup butter, softened
- dash of salt (or use salted butter)
- 1-1/2 teaspoons vanilla
- 2 tablespoons milk, divided (plus more as needed)
Directions:
- Mix powdered sugar, butter, and salt. Stir in vanilla and one tablespoon of milk. Beat until smooth. Add more milk as needed, 1 teaspoon at a time. I find 1-2 tablespoons is usually enough, but more may be added to achieve desired consistency.
Subscribe to:
Posts (Atom)